Quick answer: Macs no longer have a built-in fax modem, but you can still fax from one. The five ways in 2026 are the built-in macOS printer route (needs a landline), the Municorn Fax app (via iPhone Mirroring or the native Mac app), email-to-fax through a service like EveryFax, a browser-based online fax service, or a limited free option. Each is walked through below.
Mac fax methods compared
Five ways to fax from a Mac in 2026, compared on what each is best for, speed, cost and setup.
| Method | Best for | Speed | Cost | Setup |
|---|---|---|---|---|
| Municorn FaxRecommended | Everyday users | Fast | Moderate | Easy |
| Email-to-fax | Hospitals, legal firms | Medium | Moderate | Easy |
| Online fax (browser) | One-offs | Medium | Low | Very easy |
| Free fax | Rare emergencies | Slow | Free | Very easy |
| Printer + landline | Offices with hardware | Slow | High | Fiddly |
The five methods below are ordered for explanation, not preference — we cover the legacy macOS built-in approach first because it is the one that confuses people most (“does my Mac actually have fax?”), then move through the modern options most readers will actually use. Each method has its own step-by-step walkthrough below.
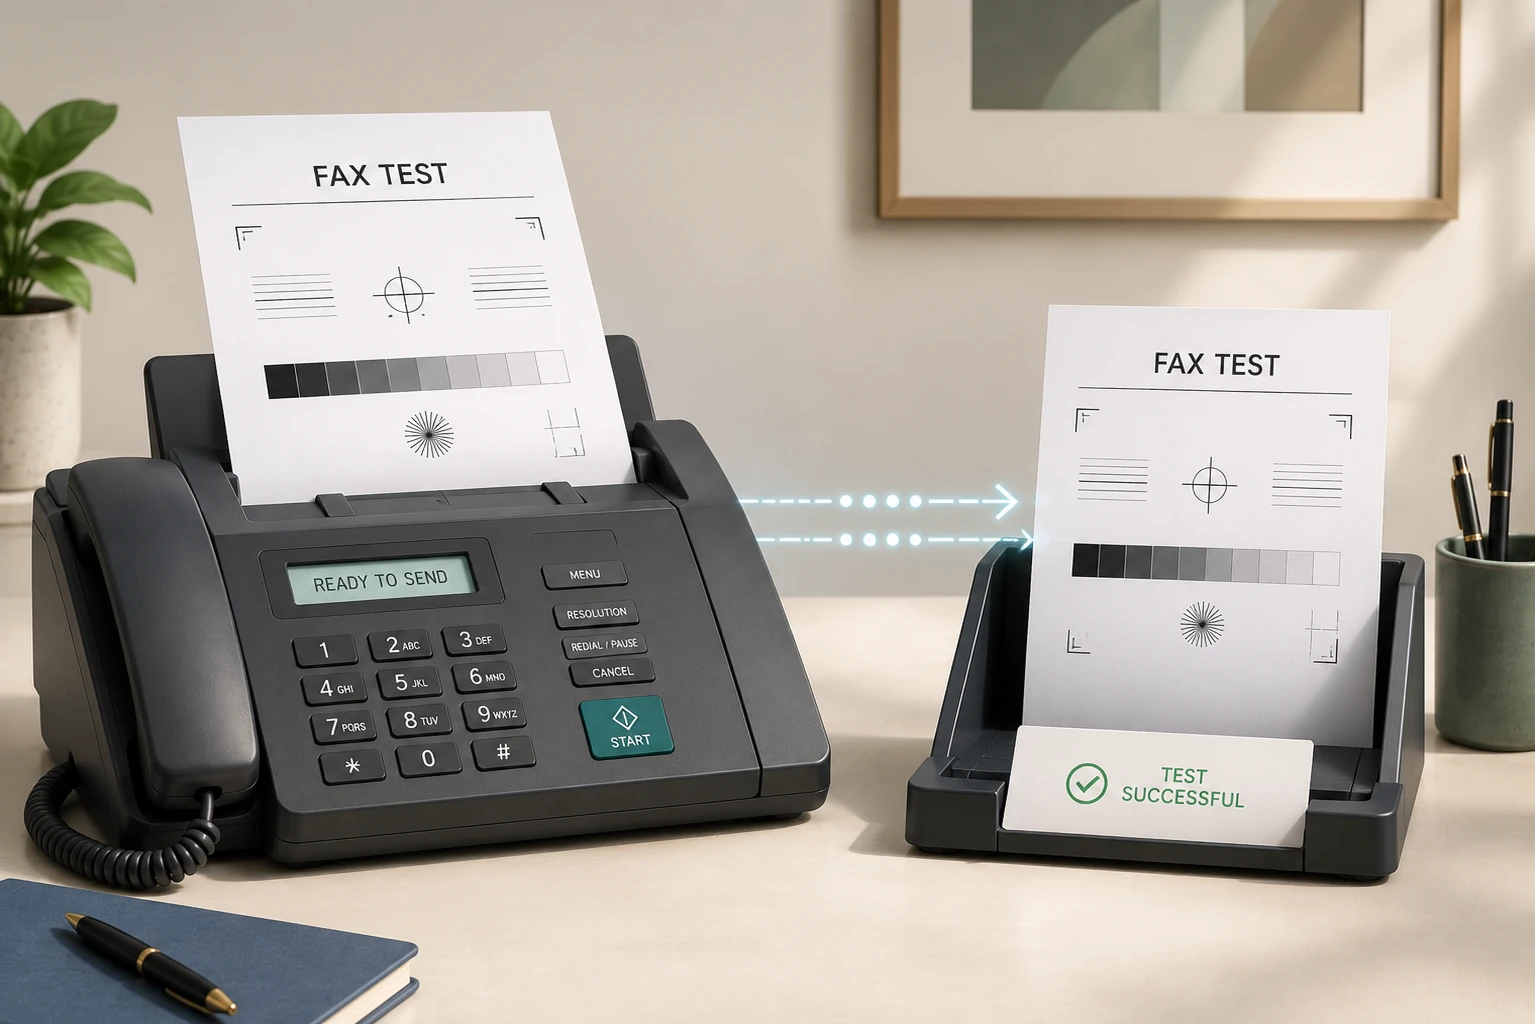
The “Old School” Way: Using a Multifunction Printer
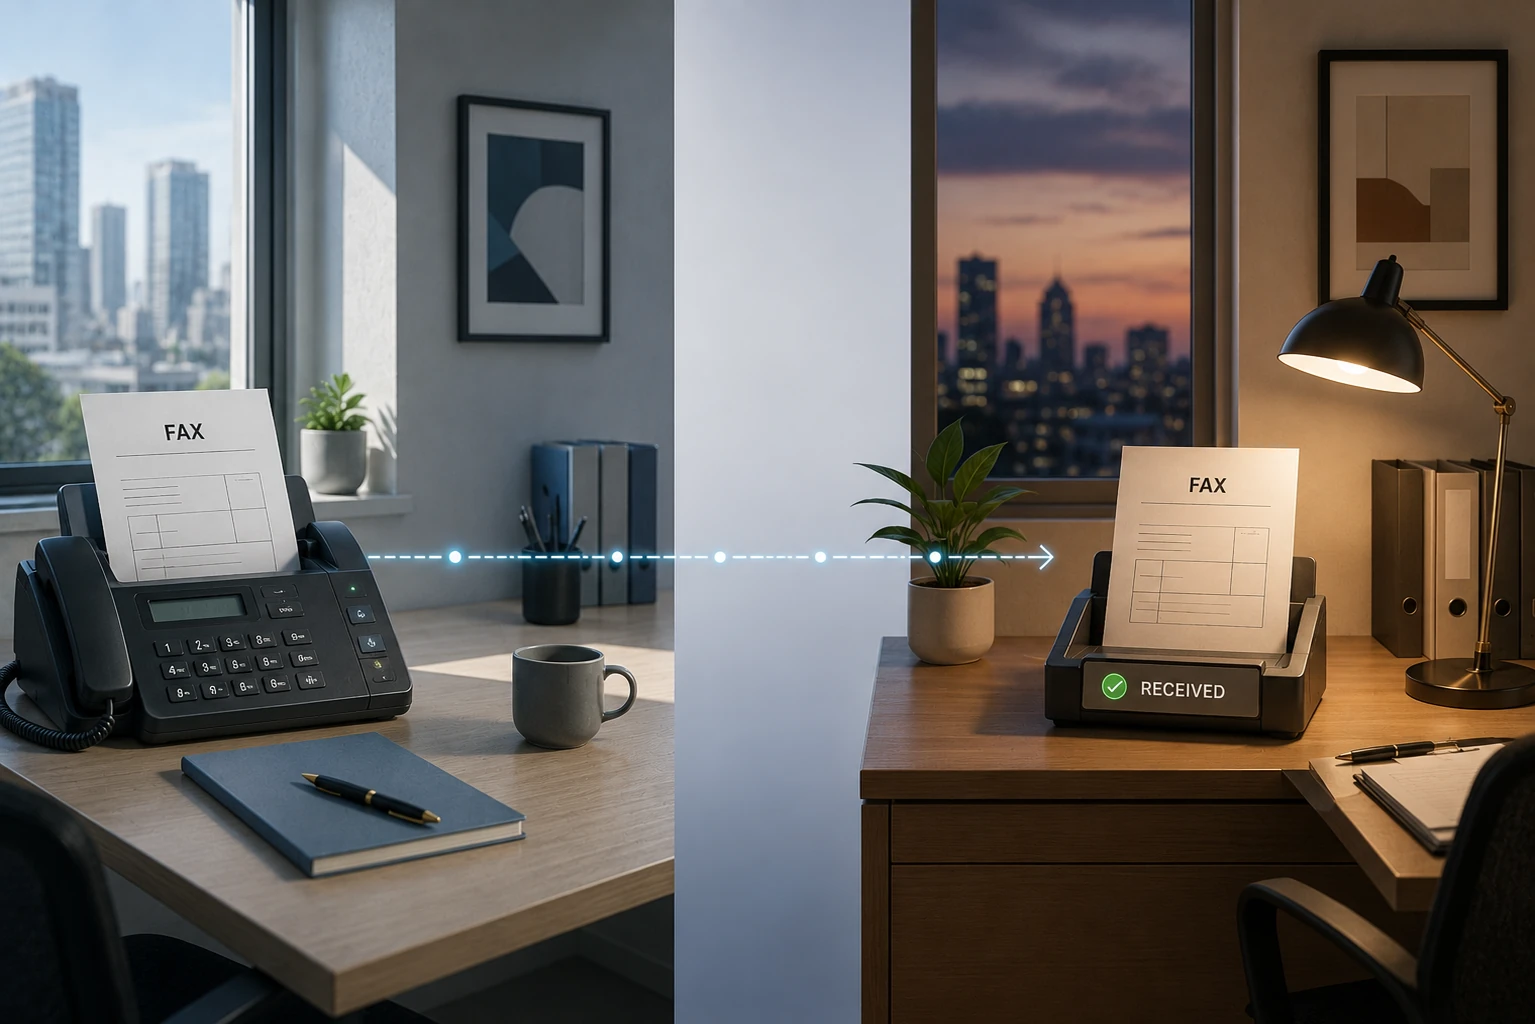
If you really want to relive the office vibes of 2005, macOS does technically still support faxing the old-fashioned way. It feels a bit like plugging a VCR into a modern 4K TV, but it works if you have the hardware.
Apple has not put a fax modem inside a Mac for over a decade, but the software to drive one is still buried in System Settings. If you have a multifunction printer (the big ones that scan, print and fax) and an active landline, you can wire your Mac directly to it.
Here is how it works, if you have the gear:
-
Connect the printer
Connect your Mac to the printer over USB (or Wi-Fi on newer models) and, crucially, make sure the printer itself is plugged into a live telephone wall jack.
-
Open Printers & Scanners
Open System Settings (System Preferences on older macOS) and go to Printers & Scanners.
-
Find the “Fax” version of your printer
If the printer is connected properly, you will see a separate “Fax” version of it in the list.
-
Print to the fax
Open your document, choose File → Print, and pick the “Fax” version from the printer dropdown. Instead of printing to paper, it asks for a fax number and dials out through the landline.
The verdict? It works, but it is heavy on setup. You need a physical phone cord, a paid landline, and a printer that probably has not had a firmware update in years. It is reliable, but for anyone working from a coffee shop or a home office without a landline, it is a non-starter.
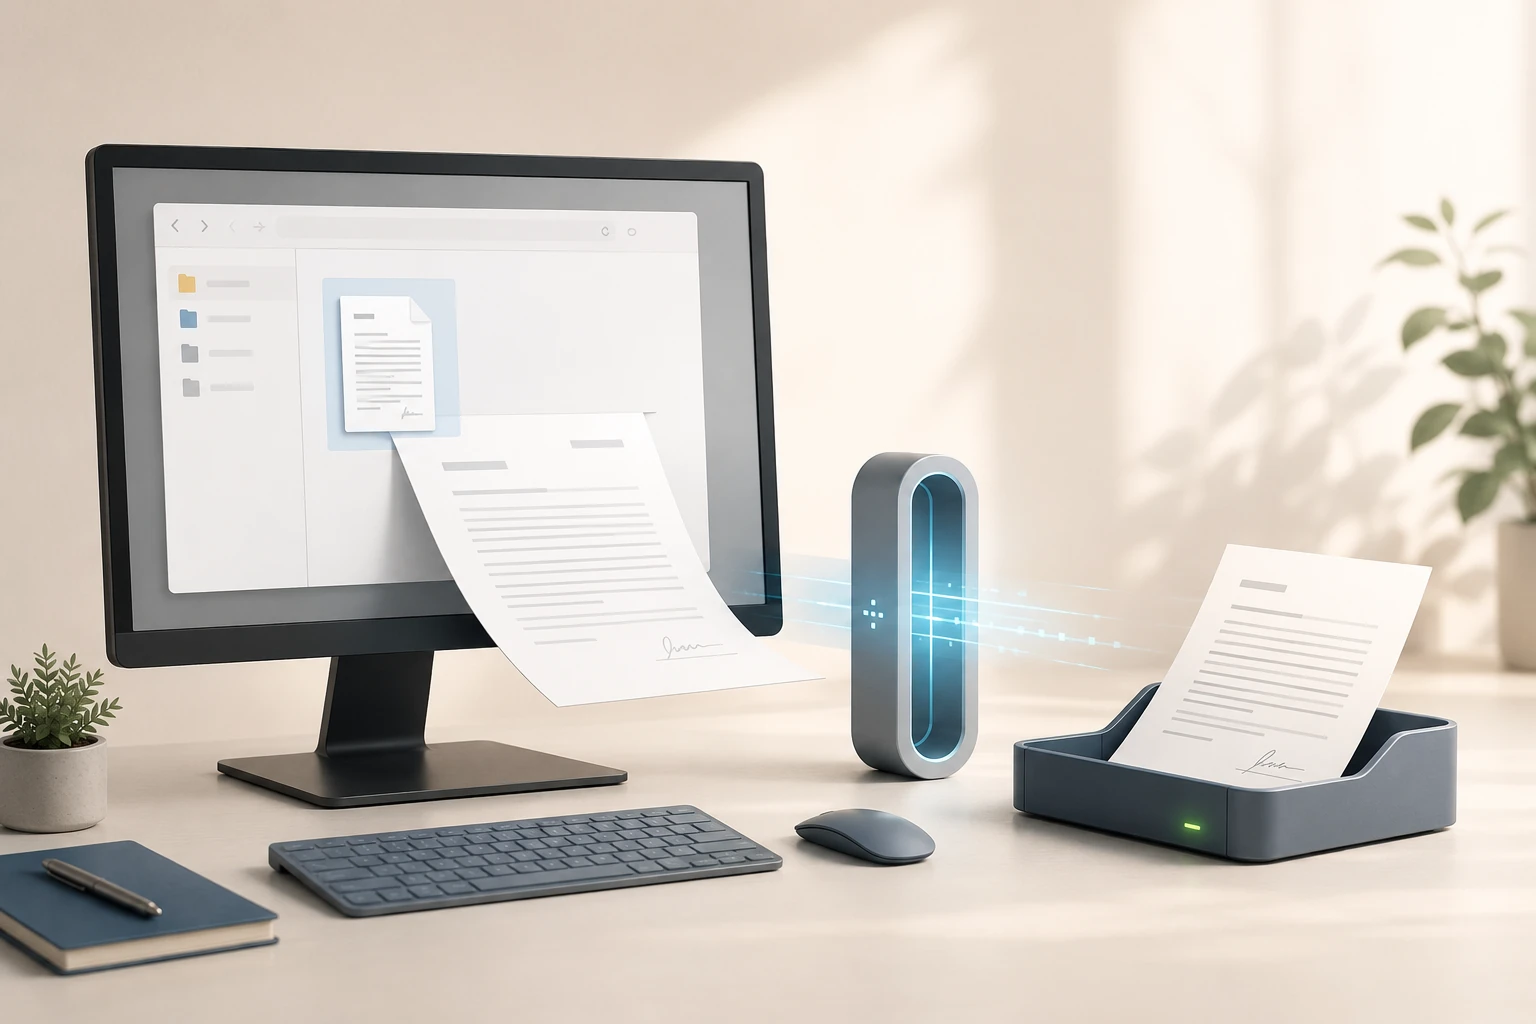
The Modern Way: The Municorn Fax App
If you do not have a landline (and who does?), the standard solution in 2026 is a dedicated fax app. These act as a virtual bridge, taking your digital file and transmitting it over the phone network for you.
There are plenty of options on the App Store, but for this guide we focus on Municorn Fax because it has the best integration with macOS features like iPhone Mirroring. For ranked comparisons of the alternatives — Fax.Plus, eFax, iFax, Dropbox Fax — see our best Mac fax services review.
There are two ways to use Municorn Fax on your Mac: the iPhone Mirroring route (our favourite, and only on Apple Silicon Macs running macOS Sequoia or later) or the native Mac app. Both are walked through step by step below.
Fax via iPhone Mirroring
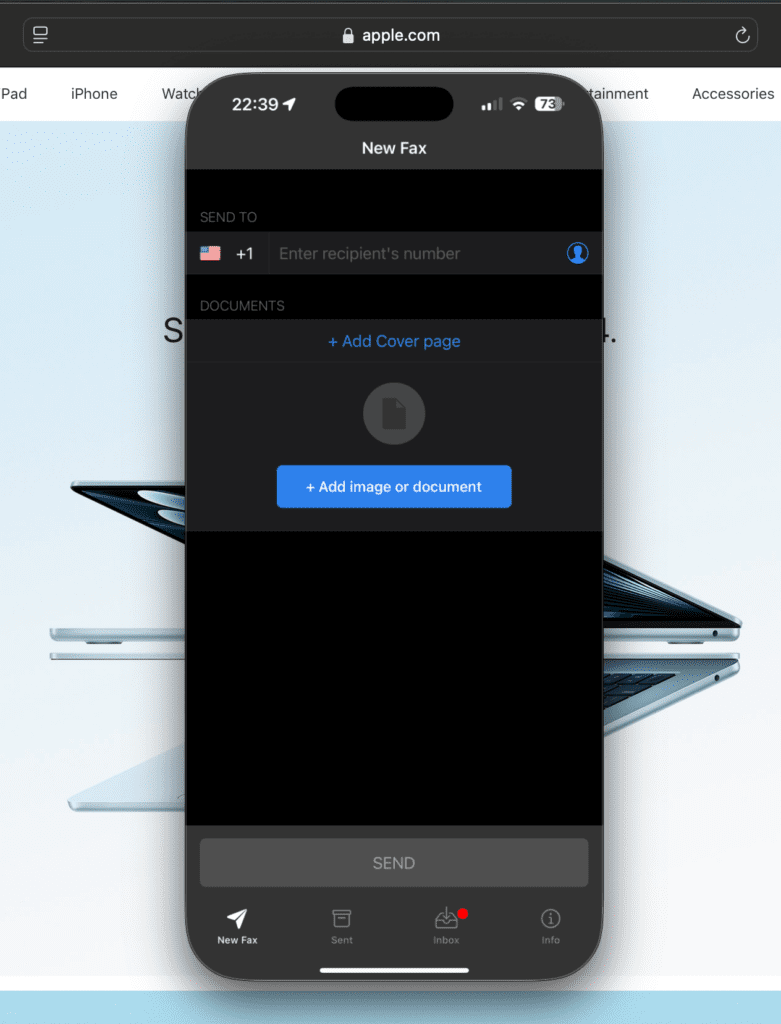
If you already have Municorn Fax installed on your iPhone, this is the fastest path. Open iPhone Mirroring on your Mac (System Settings → iPhone Mirroring, or launch it from Spotlight), unlock your phone, and your iPhone screen appears as a Mac window. Open Municorn Fax from there and you are using your existing iPhone account, contacts and fax number — no separate Mac install, no second subscription. You can also use your iPhone camera as a scanner for any paper document.
Open iPhone Mirroring
Click the iPhone Mirroring icon in your Mac’s Dock. Your iPhone screen appears on your Mac desktop, and you control it with your Mac keyboard and trackpad.
Open the Municorn Fax app
Click the Municorn icon on the mirrored iPhone screen. The app behaves exactly as it does on your phone, but you get the Mac keyboard, trackpad and drag-and-drop from Finder.
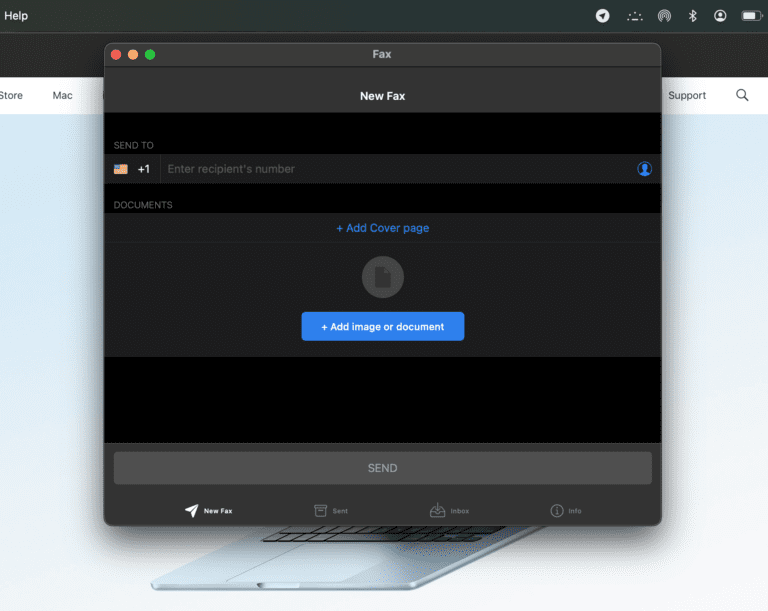
Start a new fax, attach, and send
Tap New Fax just as you would on your phone. Pull documents from iCloud Drive, Google Drive, or snap a photo, review the recipient number, and send.
The Native Mac App
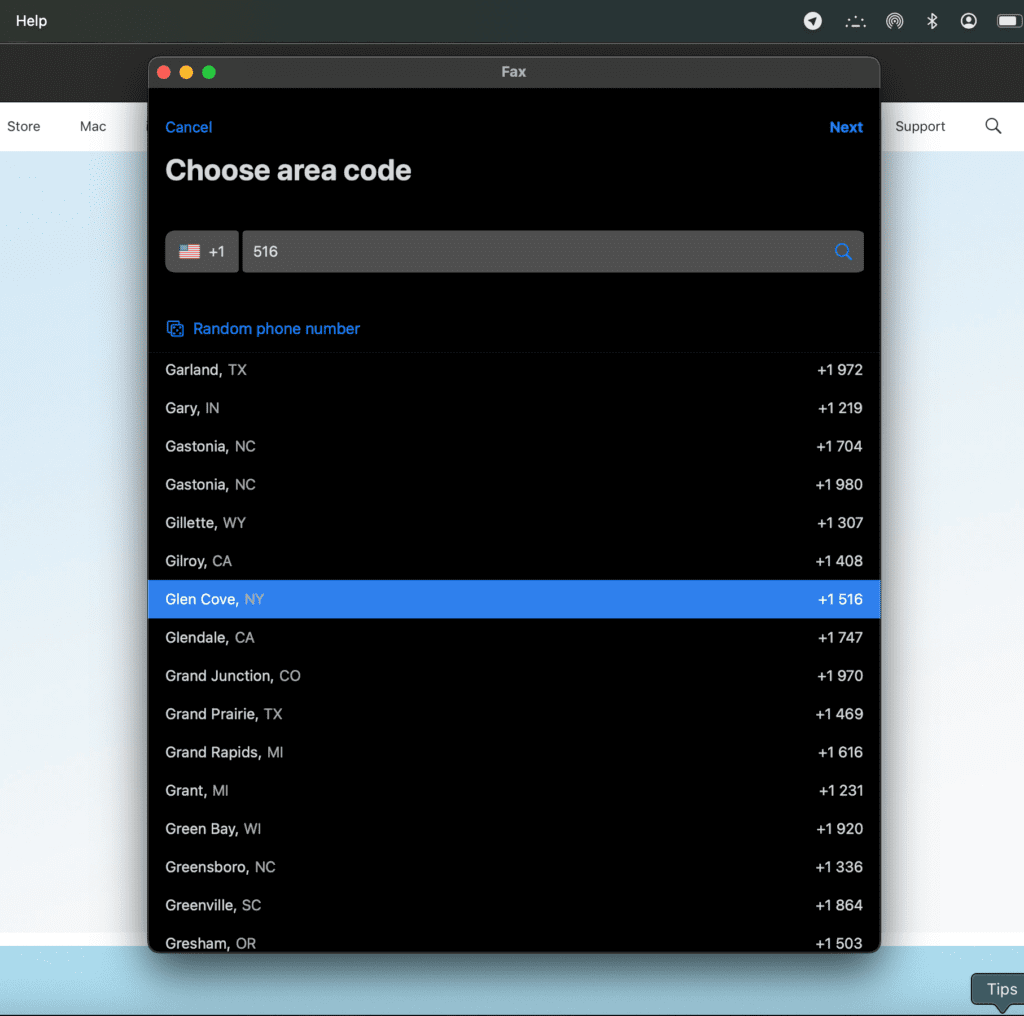
If you would rather have a dedicated Mac window, Municorn Fax is also available directly from the Mac App Store. Search the store for “Municorn Fax”, install it, and sign in with your Apple ID (which creates your account automatically, with no separate password). Choose your fax number area code from the in-app picker and you are ready to send. The flow from opening the app to fax sent takes under two minutes the first time, and less than 30 seconds every time after.
-
Download the Municorn Fax app
Search “Municorn Fax” in the Mac App Store and install it. On Mac it keeps the iPhone app’s layout but adds a proper sidebar, multi-file uploads and keyboard shortcuts. Already have it on your iPhone? Sign in with the same Apple ID and your history, numbers and contacts sync across automatically.
-
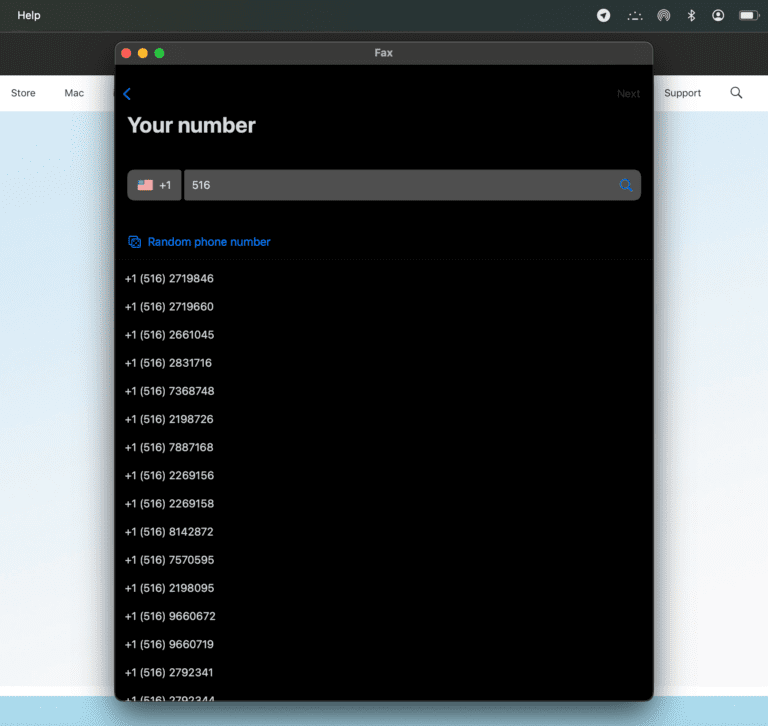
Pick a local fax number
Claim a local fax number in the US, UK, Canada and beyond — you do not need to be in that city to hold a number there, which is handy for looking local to clients anywhere. Already have a number elsewhere? Porting is supported, typically 5 to 10 business days.
-
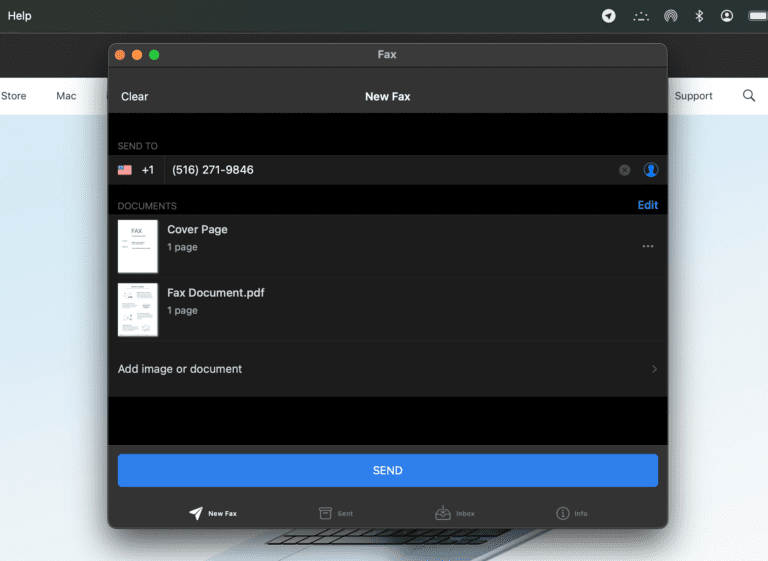
Attach your documents
On the New Fax screen, drag Word docs, PDFs or images straight from Finder. The app converts Google Docs and Word files for you, so there is no need to export first. Multiple attachments combine into one fax, in the order you add them.
-
Review your fax, then send
Double-check the recipient’s fax number, preview the pages and the optional cover sheet, then send. Each page takes about a minute and the app shows you the estimate. A confirmation lands on your Mac and iPhone once it is through.
Whichever route you take, it is the same Municorn Fax account underneath, so your history, contacts and fax numbers stay in sync across Mac, iPhone, Android and the web. You can get Municorn Fax from the App Store whenever you are ready.
The “Corporate” Way: Email-to-Fax
If you live inside Apple Mail or Outlook, downloading a separate app just to send one document can feel like digital clutter.
The good news is you can fax straight from your inbox using an email-to-fax service. Think of it as a translator layer: you send a normal email, the service catches it, converts it into analogue fax signals, and delivers it to the recipient’s machine.
This is a favourite method for lawyers and healthcare professionals because it combines the ease of email with the security of faxing. Services like EveryFax are HIPAA-compliant, wrapping your document in a layer of encryption that standard email simply does not have.
Here is exactly how to do it:
-
Compose a new email
Open your email client — Mail, Outlook or Gmail, it does not matter — and start a new message.
-
Address it to the fax number
In the “To” field, do not type an email address. Type the recipient’s fax number followed by the service’s domain. For EveryFax that looks like
[email protected]. -
Attach your documents
Drag your documents into the email. You do not need to convert them first — whether it is a PDF, Word doc or JPEG, the service turns them into fax pages in the order you attached them.
-
Send
Hit send, and you are done. A confirmation email arrives a few minutes later, once the fax has been delivered.
It is the best option if you want a strict paper trail of everything you send without leaving your email workflow.
The Browser Way: Online Fax Services
If you do not want to download anything, a browser-based service works on Safari or Chrome and lets you fax from any Mac you log into — useful if you switch between machines or just do not want another menu-bar app.
The flow is much the same across providers: open the service’s website, sign in (or sign up if it is your first time), choose a fax number, and use the in-browser composer to send. We have covered the two most common options below. For ranked reviews comparing fax quality, support and pricing across all major services, see our best Mac fax services review.
How to use eFax on Mac
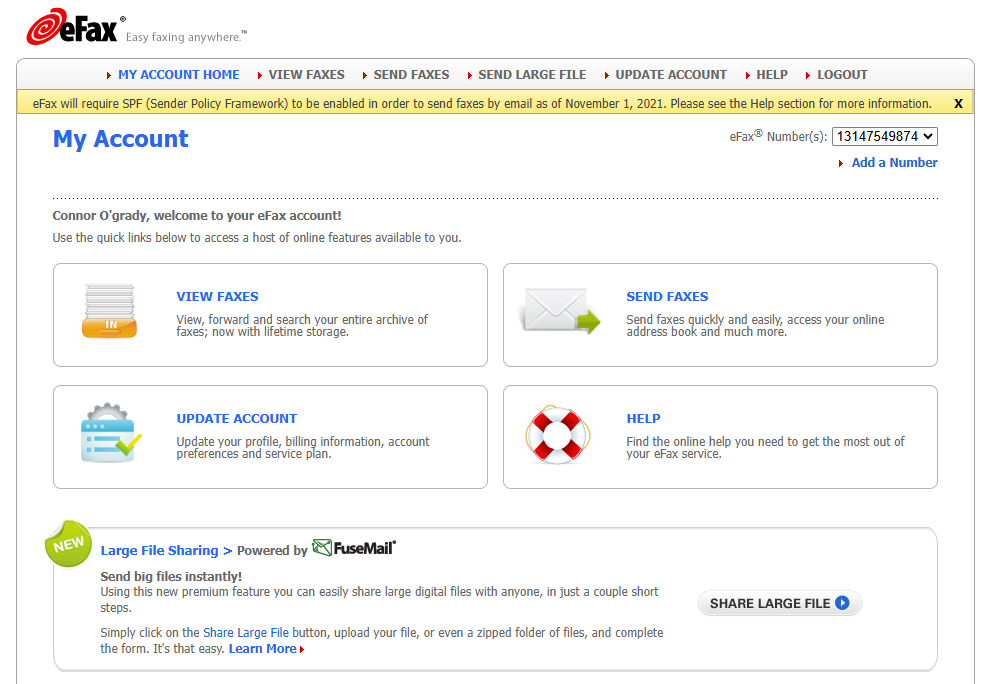
- Sign up: Go to efax.com in Safari or Chrome and pick a plan. Account creation needs a credit card even on the trial.
- Choose your number: During setup, eFax assigns you a fax number — pick the area code you want from the dropdown.
- Open the inbox: Once signed in, you land on a Gmail-style inbox. Click Send Fax in the top toolbar.
- Compose and attach: Enter the recipient’s fax number, drag your PDF, Word or JPEG into the attachment area, and optionally add a cover page from the template picker.
- Send and confirm: Hit Send. You will get a delivery confirmation email a few minutes later.
For a full review of eFax’s quality, value and where it falls short, see our Mac fax services review.
How to use Fax.Plus on Mac
- Create an account: Go to fax.plus and sign up with your email — Fax.Plus offers up to 10 free pages before requiring payment.
- Verify your email: Click the verification link Fax.Plus sends to confirm your account.
- Get a fax number (optional): If you only need to send, you can skip this. To receive faxes, choose a number in your account settings.
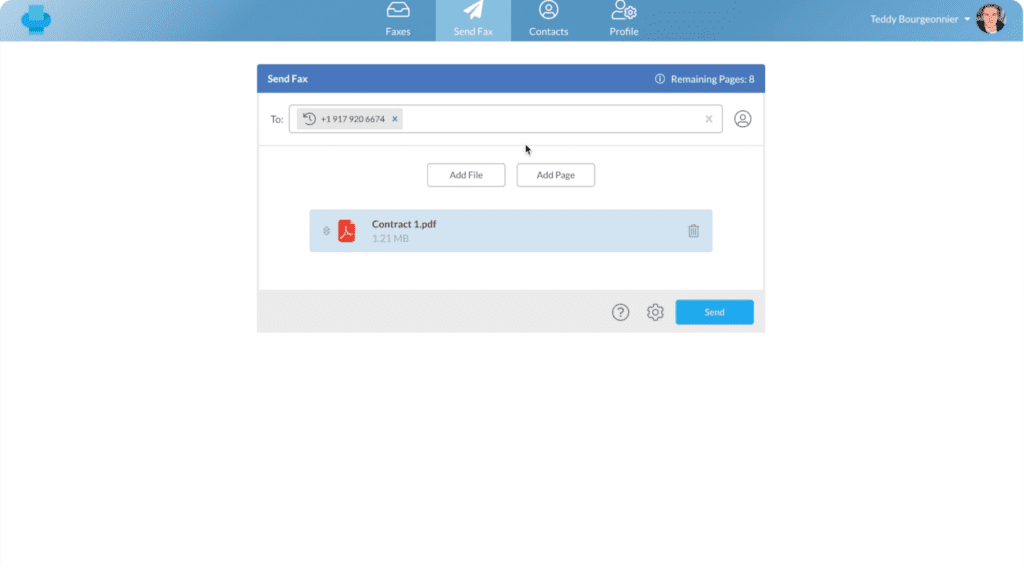
- Compose: Click Send Fax in the dashboard. Enter the recipient’s fax number, attach your document, and add an optional cover sheet.
- Send: Hit Send and watch the status update in the dashboard. If you would rather watch a walkthrough than read one, the Fax.Plus review covers the same flow.
The browser flow is virtually identical for the other major providers (RingCentral, MetroFax, MyFax) — sign up, pick a number, compose, attach, send.
Free Options (With Limits)
Faxing costs money because it uses real telephony infrastructure. If you only need to send a one-off page and do not care about cover sheets, there are free options — though they come with strict limits and quality compromises.
FaxZero — go to faxzero.com, fill in the sender and recipient fields, attach a PDF or Word doc (up to 3 pages), pass the captcha, and send. Five free faxes per day, but a “FaxZero” branding logo is added to the cover page.
GotFreeFax — go to gotfreefax.com, fill in the sender and recipient details, attach up to 3 pages, and send. Two free faxes per day to US and Canada numbers only, with no sign-up required.
For a deeper comparison of free fax services — quality test results, security caveats, and which ones are actually safe for sensitive documents — see our free fax services review. For Mac-specific evaluation of the paid alternatives that beat free options on every axis except price, see our best Mac fax services review.
Troubleshooting Common Mac Fax Issues
You followed the steps, but something went wrong. Here are the issues we hit most often during testing, and how to fix them.
“Fax” does not appear in Printers & Scanners
- Printer driver: Apple removed the bundled fax drivers from current macOS. Visit your printer manufacturer’s website (HP, Brother, Canon and so on) and download the latest macOS driver — you may need the “Fax” driver as a separate install.
- Phone line: The printer must have a physical phone cord in a live wall jack. No active landline means no fax option appears in Settings.
- Connection method: Some printers only expose the fax driver over USB, not Wi-Fi. Try connecting via USB and re-adding the printer in System Settings.
A fax will not send from an online service
- Check the recipient number format: Most US and Canada services expect 10 or 11 digits with no symbols. Drop dashes, parentheses and country-code prefixes if they are not required.
- Recipient machine offline: Receiving machines go down more often than you would expect — paper jams, busy signals, disconnected lines. Wait 10 minutes and try again, or call the recipient to confirm their machine is on.
- Page or credit limit: Some services cap pages per day or per month. Check your dashboard; you may need to upgrade or wait for the cycle to reset.
- File format unsupported: If the service rejects your attachment, convert to PDF first. Every service supports PDF, but Pages, Numbers and Keynote files often need exporting.
Email-to-fax is not working
- Sending address must match your account: These services only accept emails from addresses registered to your account. If you send from a different inbox (work instead of personal, say), it gets rejected. Add the alternate address in your account settings first.
- Domain typos: EveryFax is
@send.everyfax.com, not@everyfax.com. eFax is@efaxsend.com. A single wrong character means it will not arrive. - Attachment size: Most services cap attachments at 25MB total. Compress PDFs or split into multiple emails if your file is bigger.
The confirmation email never arrived
- Check spam: Confirmation emails frequently land in junk, especially the first few times. Mark as not-spam to train your inbox.
- Check the service dashboard: Confirmations also appear in the web dashboard under “Sent”. If it shows “Delivered” there, the fax went through even if the email did not.
- Long transmission: Multi-page faxes take several minutes to transmit, and confirmations do not fire until the last page goes through. Wait 10 to 15 minutes for long documents.
Final Verdict: Which Method Is Best for Mac?
Everyday Mac users
Municorn Fax via iPhone Mirroring is the fastest workflow if you are in the Apple ecosystem — no extra hardware, no browser tabs, just mirror your phone and send.
One-offs
Any browser-based service works fine, and FaxZero needs no account for the occasional page.
Lawyers and healthcare
Email-to-fax is the right call — it keeps everything in your existing inbox, and services like EveryFax are HIPAA-compliant.
Landline and printer owners
The built-in macOS fax support still works, though setup is fiddly and you are tied to a physical phone line.
If you would like to compare specific fax services on quality, value and Mac compatibility before committing, our best Mac fax services review ranks the major options head-to-head.